
Rogue Blight Combat
Stamina, spacing, parry, status, and potion timing against enemies that fight like bosses.
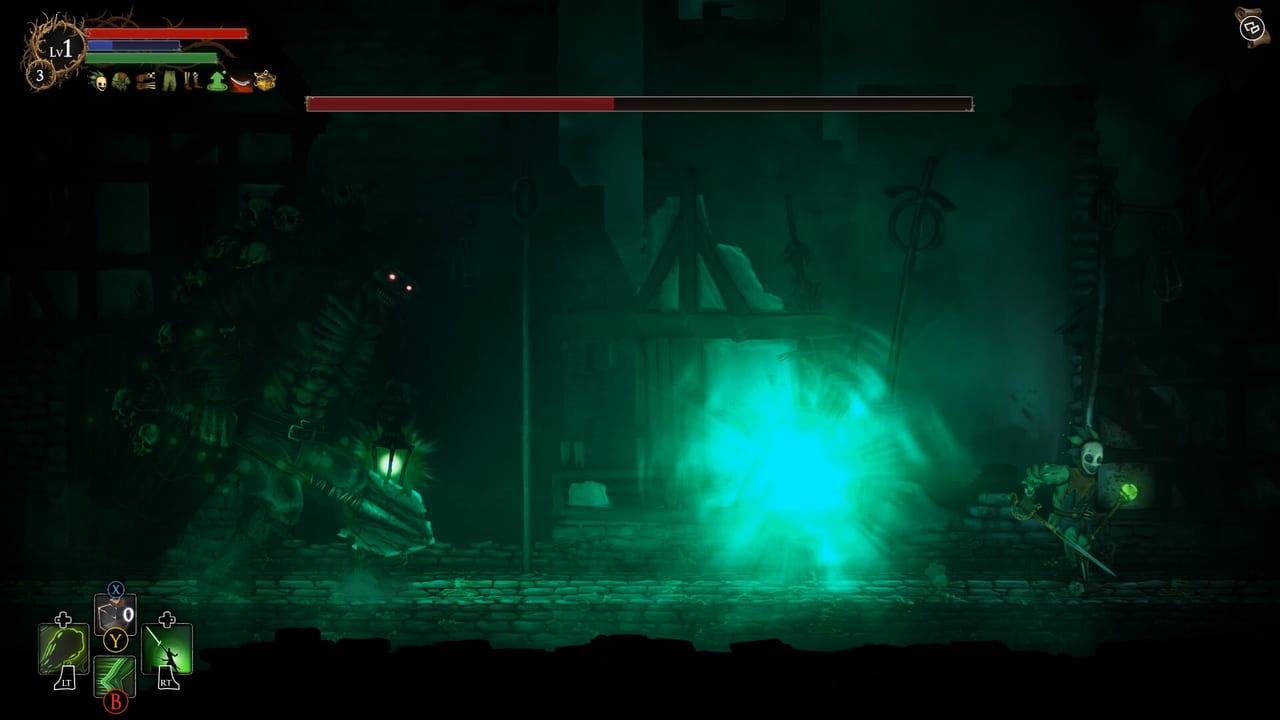
Rogue Blight’s combat is a 2D souls loop in a small arena. You fight one enemy at a time, you pay stamina for attacks and dodges, and you drink flasks on purpose. CodeRadGames has said the focus is one-on-one fights with detailed moves and AI, and that even basic enemies can feel like mini-bosses. That is not marketing fluff once you are in Waywood Forest. This page is launch-week fight advice from official Steam copy, the developer interview, the demo, and public footage. It does not invent DPS tables.
Learn the buttons on controls first. Come back here when you understand X for potion swap and still lose half a bar to a three-hit string. Named bosses have their own tells on bosses. Status names and what they actually do sit on status effects.
The stamina loop
Stamina is the fight. Swings spend it. Dodges spend it. Empty the bar and you cannot attack or step through the next hit. Jumping in footage does not replace a dodge: the dash is where invincibility frames live. A useful default string:
- Walk just outside the enemy’s longest swing.
- Let the first attack commit.
- Dodge through or away while you still have stamina in reserve.
- Land two or three hits, not a full clip.
- Back off so the bar returns before their follow-up.
If you mash a wooden-sword combo until the bar dies, you will eat the punish. That is the entire souls lesson, compressed into a 2D rogue-lite node. Recovery speed is not a hidden stat you can ignore: footage described Dexterity as crit chance and stamina recovery, which is why a dagger pair can keep swinging when a heavy sword user has to pause.
Weapon skills spend mana, not stamina, which tempts people to dump the stamina bar on lights and then panic-skill. If the skill is a dash (Dashing Thrust) or a damage steroid (Berserk), you still need stamina after it lands. Open with the skill, then take the punish window; do not skill as a cancel for a bar you already spent.
Spacing in a 2D arena
Arenas are small. Wands help because official comments say they deal less damage on normals but much better range, with harder-hitting skills that eat more mana. Swords want mid range. Daggers want to be in the hurtbox and out again. Shields want the incoming arc aimed into the left hand.
Mouse aim changes this. You can slash upward at a leaping body or fire a skill the wrong way because the cursor sat on your own feet. Keep the cursor on the enemy’s center of mass. After a dodge-through, flick aim to the new side before you swing. Controls covers the bind; this page cares about the habit.
Vertical space matters on tall enemies. Gorilla and similar chapter threats occupy a lot of the screen. Jumping into an air swing can connect when a grounded slash whiffs under a raised arm. Jumping into a slam is still a slam. Use height to match the hurtbox, not to panic.
Hazards exist. Demo players dashed through environmental hits the same way they dashed through swings. If a node has floor danger plus an enemy combo, treat the floor as a second attacker and stop greed-hitting.
One-on-one fights as mini-bosses
You will not clear a room of ten skeletons. You will duel a single designed monster, then return to the map. That is why “trash” feels unfair: it has a wind-up, a string, a punish, and often a status. Learn the first forest enemy the way you would learn a Dark Souls hollow that actually kills you — count the hits, find the gap, do not invent a crowd-control plan.
A launch-week read on a new enemy:
- Watch one full string without attacking.
- Note whether the last hit has extra recovery (that is your window).
- Note whether they chase a dodge or turn slowly (that decides through versus away).
- Note a status glow. If they apply Burn or Shock, your flask plan changes.
- Only then take a real punish.
Elites are the same lesson with a longer health bar. If you cannot beat the elite, you will not beat Wendigo. Spend a death learning the elite instead of routing around every skull forever. The walkthrough can tell you which nodes are optional; it cannot dodge for you.
Parry, stagger, and the parrying dagger
Parry exists. It is not a global face button on every weapon. The documented tool in footage is the parrying dagger: its skill deflects an enemy attack and leaves them staggered. The tooltip in that footage showed a mana cost (10 mana) and Dexterity scaling. That means a missed parry is not free — you spent the flask resource and still have to dodge.
When a parry connects, you get a stagger window. That is the time to dump a right-hand skill, not to admire the spark. Blessings in footage included a line that after a successful parry you reflect damage and regain all stamina. That is a run-specific modifier, not a base rule. Do not assume every parry refunds the bar unless the blessing text says so.
Shields are a different defensive verb. Steam says shields are left-hand only. Footage of ice-style shields showed a hunkering block that could blast damage back and apply Freeze if you timed the incoming hit. That is still not a parry dagger. If you cannot read a wind-up yet, dodge. If you can read it and you built Dexterity, try the dagger. If you built a left-hand shield, block the aimed arc and punish.
Status application
Steam lists ten statuses that apply to any enemy, including bosses: Bleed, Poison, Burn, Freeze, Shock, Choke, Shatter, Life Splash, Darkness, and Light Struck. Public footage described application as additive (a weapon that applies 25% per hit fills a 100% bar over multiple connects). Dual-wielding two weapons of the same type in that footage cut both damage and status apply rate by 40% while swinging both at once — still two hits, not a dead status plan.
Launch-week habits:
- Pick one primary status for the run and feed it. Bleed plus Poison plus Burn on random drops is a rainbow, not a build.
- Bosses take status. Do not save the bar for “later.” There is no later.
- Mana potions can interact with apply rate. Footage showed a blessing: drinking a mana potion increased status apply rate by 100% for 12 seconds. That is a blessing, not a base flask effect.
- Freeze and Shock change the punish window more than raw chips do. If you find a control status, space for the proc instead of greed-hitting through it.
The status effects page is the glossary. This combat page only needs you to treat the status bar like a second health bar you are trying to empty.
Potion timing
Health and mana flasks are the only panic buttons that do not cost stamina, and they still cost time. Drink after a string, not during the wind-up. Swap with X (or D-pad down on a pad) before the drink so you do not heal when you meant to fund a skill.
- Drink health when you have already dodged and the enemy is recovering. A 35%-less-damage-above-70%-HP blessing appeared in footage; if you have that, topping up past the threshold is a combat action, not hygiene.
- Drink mana before a planned skill, especially Berserk (wooden sword, 15 seconds, footage showed +25% damage) or a parry you intend to throw on a known slam.
- Second Life appeared in footage as a blessing that prevents death, grants 3 seconds of invincibility, then destroys itself. That is not a flask. Do not play as if you have two lives unless the blessing is actually equipped.
Bonfires refill. Some unknown events refill. Shops might not. Walking into a boss node with one flask type empty is a routing mistake that getting started already warned you about.
Dual-wield in a live fight
You always hold two one-handed items unless a hand is empty. Same-type pairs in footage attack together. Mixed pairs give you two different skills and two different statuses. In a duel, that means you should know which button is the gap-closer and which button is the punish.
Example from public clips, not a complete database: iron sword Rising Slash as a vertical punish, parrying dagger as the read, dual daggers Dashing Thrust as the entry. If you cannot say out loud what each hand does before the enemy moves, sit at the node and swap until you can. Then fight.
Armor of Thorns (reflect), extra damage after combat, and water pulse every 3 seconds also showed up as blessings. Those change how greedy you can be; they do not replace a dodge. Build synergy is weapons and builds. Execution is this page.
Treat the next forest enemy like a chapter exam. If you can take a full string without panic-drinking, you are ready for Gorilla and Wendigo. If you cannot, another shop node will not save you.
Frequently Asked Questions
Quick answers to the most common questions.
Why do regular Rogue Blight enemies feel like bosses?
Fights are one-on-one with full strings, stamina punishes, and status bars. The developer has said even basic enemies can feel like mini-bosses. Learn one string at a time.
When should I drink a health potion versus a mana potion?
Health after you have already dodged a string. Mana before a planned skill or parry. Press X to swap flasks. Do not drink during a wind-up.
How does parry work?
It is a weapon skill, documented on the parrying dagger: deflect to stagger. Footage showed a mana cost. Missed parries are expensive; dodge until you can read the slam. See controls.
Do status effects work on bosses?
Yes. Steam says Bleed, Poison, Burn, Freeze, Shock, Choke, Shatter, Life Splash, Darkness, and Light Struck apply to any enemy, including bosses. Details on status effects.
Should I empty stamina on every combo?
No. Leave enough bar to dodge the follow-up. Dexterity was described in footage as crit plus stamina recovery, which is why dagger pairs can chain longer than heavy swords.
Where do I learn boss tells?
On the bosses page and in the walkthrough. Combat rules on this page still apply: one enemy, stamina, flasks, mouse aim.